Tag Archives: working practices

Talking tech: Clipboards

In this month’s Talking tech column, Andy Coulson looks at getting the most out of your clipboards. There’s more than one, for a start, and they include several tools and functions you might not have known about.

We all use the clipboard frequently: that useful little bit of temporary storage that allows you to copy a bit of text and repeatedly paste it into a document can often simplify repetitive jobs. However, a recent job that meant adding a lot of tags to the text to tell the typesetter how to style the paragraph, like <A> to flag that the current line is an A head, really highlighted the limitations of this and got me looking at whether there might be better ways to do things.

Office clipboard
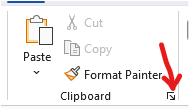
Arrow in clipboard section of WordIn Windows there are in fact two clipboards if you use Office, as that has its own clipboard. The Office clipboard lets you review the last 24 items stored to it. You can access this by clicking on the little arrow in a box in the Clipboard section of the Home ribbon in Word (indicated by the red arrow here).

You then have a sidebar that gives you access to up to 24 items on the clipboard. You can click on these and paste them into your document. When you get to 24 items the next item you copy goes to the top of the list and the bottom item is removed from the list. This means if you are repeatedly using items then your regularly used items can drop off the bottom of the list. Closing all Office programs will also empty the Office clipboard, so if you are doing something like tagging, it is worth keeping a Word or Excel Window open to preserve your clipboard list.

If you are using the clipboard to rearrange text, there are a couple of ways of working around this problem by bypassing the clipboard and keeping its content intact. The first of these uses the mouse. Select the text to move with the mouse by left-clicking and dragging, then move the mouse to where you want to move the text, hold the Ctrl key and right-click once where you want the text to go. Your text will pop up in the new destination. You can also drag the selected text by keeping the left button pressed while moving to the new location.

The other tool is the spike (named after the old-fashioned spike often found on editors’ desks). This allows you to collect several bits of text from the document and put them elsewhere in the document, or in a new document. Imagine you need to rearrange some paragraphs, clipping lines from two or three places to create a new paragraph. Spike will paste all the items you collect as a single block of text, so you need to think about the order you collect the text in. The first item you clip will be the first item in the pasted text and so on. So, you select the first item and press Ctrl+F3. This cuts the item to the spike, but if you want to copy, just press Ctrl+Z after: the item is still on the spike, but remains in its original place too. When you have collected all the pieces you want, place the cursor where they are going (or open a new document) and press Ctrl+Shift+F3 to paste all the items.

Someone typing on a laptop

Windows clipboard

Windows also has a clipboard that operates in a semi-detached fashion from the Office clipboard. Historically this also had a clipboard history tool which disappeared at some point, but is now back in Windows 11. It can be enabled by going to Settings, System, Clipboard and turning ‘Clipboard history’ on at the top of the list. Ctrl+V will then bring up the Windows clipboard history.

You can paste directly from here into Word, and this material is saved even when your Office programs are closed. You will notice, if you have Office clipboard open, that the items copied from the Windows clipboard appear in the Office clipboard. This can be a bit confusing, and I’m not entirely sure about the rationale of having two clipboards – I’m assuming it is for compatibility with the Mac version of Word.

Windows 11 clipboard history

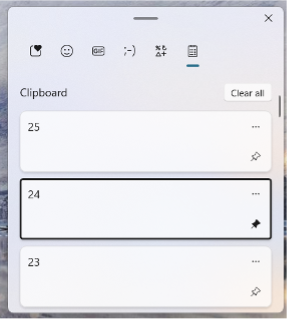
The Windows 11 clipboard history (shown here) has a couple of potentially useful tools. Firstly, you can see that there are various icons across the top. Perhaps the most relevant is the symbols one, second from the right. This is like the ‘Insert Symbol’ command, giving access to all the available symbols for the current font. The other is that you can pin items to the clipboard, by clicking on the little pin to the right of each item (24 in the list in the image is pinned). These are saved until you clear them and are saved in addition to the 24 items in the Windows clipboard, although if you paste into Word they will take up one of the 24 slots in the Office clipboard. You can use this as a way of saving regularly used items (like my tags) and bringing them back into the Office clipboard when you need them. You probably won’t be surprised to learn that there is a macro that does something similar, and I’ll touch on that below.

Useful macros

One particular macro, CopytoClipboard, was discussed on the forums here – contributed by James Baron with a bit of refinement from Paul Beverley. What this does is let you create a Word file and, with the Office clipboard sidebar open, it will populate the clipboard from the file. This is what I ended up using to tag my file. If things dropped off the bottom of the list, I could clear the clipboard and reload from the file. It meant I had a list of tags I could click on to insert, and could import with the correct formatting.

It is also worth looking at Paul’s FRedit macro (or Windows Find and Replace if there are only one or two patterns) to see if there is a pattern you can find to do the pasting or formatting for you. In my tagging example, if there had been numbered headings, you could potentially have searched for heading styles or the pattern of numbering and added the tags automatically. Even if that was only 90% correct in a long manuscript, that could still be a significant time-saving.

Clipboard extenders

Finally, there are various clipboard extender programs that add to the functionality of the clipboard. I have used ClipX in the past, but this hasn’t been updated for several years, so I wouldn’t recommend it. This allowed the clipboard to have more capacity as well as providing ‘stickies’, which were like the pinned items in the Windows 11 clipboard, but were presented in a really useful pop-up menu.

There are many others available, but going by most of the reviews, I have so far avoided trying any, as I think they may actually cause more issues than they solve. If anyone has tried any and rates them, please let me know in the comments, and we can perhaps have a round-up in a future column.

I realise I have not touched on the Mac clipboard, for which I apologise as a non-Mac user. However, the bit of reading around I have done suggests the situation on the Mac is similar. Again, if anyone would like to share their Mac experiences in the comments, we can perhaps revisit this.

To sum up, the clipboard is really several clipboards that operate in similar and overlapping ways. On Windows 11 with Office you have a number of tools for cutting, copying and pasting text that work pretty well. Things start to get a bit trickier if you have to copy and paste a larger number of items frequently – as in my tags example – where copying from another document each time is slow and creates a lot of wear and tear on your mouse hand. It is worth spending some time exploring whether there are better ways of doing this to improve your efficiency and look after your wrists.

About Andy Coulson

Andy CoulsonAndy Coulson is a reformed engineer and primary teacher, and a Professional Member of the CIEP. He is a copyeditor and proofreader specialising in STEM subjects and odd formats like LaTeX.



About the CIEP

The Chartered Institute of Editing and Proofreading (CIEP) is a non-profit body promoting excellence in English language editing. We set and demonstrate editorial standards, and we are a community, training hub and support network for editorial professionals – the people who work to make text accurate, clear and fit for purpose.

Find out more about:


Photo credits: header image by Pixabay, someone typing on a laptop by Breakingpic, both on Pexels.

Posted by Eleanor Smith, blog assistant.

The views expressed here do not necessarily reflect those of the CIEP.

A week in the life of a broad-spectrum editor and trainer

Gale Winskill is an editor with a varied workload: she edits fiction and non-fiction for publishers and indie authors, as well as providing training and tutoring for authors and editors. In this post she explains why she embraces this variety, and describes a (more or less) typical working week.

Keeping outside the box

I’ve been a freelance editor twice in my career: first, in Hong Kong back in the 1990s, when I wrote and edited school and university textbooks; and second, since 2008 in the UK, when my interests rather diversified.

In between, I worked in-house for ten years, primarily as a children’s editor, but also editing general adult non-fiction. Now, although my specialism is undoubtedly fiction (adult, YA and children’s) – which is what some of you possibly know me for – you might be surprised to know that I still dabble regularly in non-fiction and also do various bits of training.

I understand why some editors might find working exclusively on non-fiction to be more reassuring than the vagaries of fiction. Conversely, others prefer the flexibility of fiction to the rigours of reference systems or weighty topics. But for me, an assortment of fiction and non-fiction titles is infinitely preferable. I function better with a variety of things to work on, to ensure I don’t become complacent or bored.

Moreover, although known as a fiction editor, my refusal to be put in a subject-specific box also means that skills I learned in-house some time ago are still relevant today. I can apply my knowledge of references, bibliographies, permissions, captioning, illustrations, and so on, to non-fiction titles, or to certain types of memoir. And although my main area of work these days is general adult fiction, I still love working on children’s or YA novels, as well as picture books, which rely heavily on my previous experience as a children’s editor.

Then there’s the training. Alongside tutoring on the CIEP’s Introduction to Fiction Editing (IFE) course and writing/presenting the occasional course for other clients, twice a year I teach on the HarperCollins Author Academy. This course is specifically for authors from under-represented backgrounds, with the aim of helping them to negotiate the publishing industry.

Consequently, there is no such thing as a ‘normal’ week for me, as it really depends on my workload, client list or the time of year. That said, some things are set in stone. When the weather allows, I play tennis four mornings a week before work, in order to get some exercise and fresh air and vent any frustrations on a tennis ball rather than someone’s text. Then I’m at my desk and ready to go.

An atypical, typical editing week

So, let me introduce you to a fairly recent, but not-untypical week. It started with the copyedit of a substantial historical novel, written by an author whose previous work had just won a prestigious national writing award. But I didn’t know this when I accepted the work and confess to never having heard of the author before then! It was the first time I had worked for the publisher in question and the brief was short and to the point: copyedit the text; check the historical details and language idiosyncrasies; liaise directly with the author; send it back when it’s clean.

In my experience, it’s unusual to have direct contact with an author, particularly when the publisher has never worked with me before and the author is undeniably successful. So, to be handed the author’s personal email and told to return the text when the novel was clean was decidedly daunting.

At this point in the commission, at the start of the week, the main editing had been done, and the author and I were debating my queries and comments. These included the use (or not) of certain expressions at a specific moment in time, aided helpfully by the Historical Thesaurus, as well as the use of the ampersand (or not) in some historically extant company names – thank you, Mr Google!

The edited text went back and forth from Monday to Wednesday. The author capitulated on some queries; held their ground on others. Emails were exchanged at strange hours of the day and night, full of hilarious, sweary exchanges about everything and nothing, some of it even related to the work at hand. And then the novel was returned to the commissioning editor. Job done.

Laptop, coffee, notebook

During the same days, when waiting for responses to outstanding queries and comments on the above, I started work on a non-fiction book for a different publishing house. The original editor was on maternity leave, so my brief spanned both project management and editing. I was to wrest the work into a solid publishing proposition and guide the inexperienced authors along the way.

The text had been written in several disconnected incarnations that had eventually been cobbled together to form a vaguely complete text. But it still lacked an introduction and a conclusion to explain the authors’ aims and deductions. To complicate things further, a few of the original draft chapters had been looked at by another editor, so the text was littered with their comments, which also needed to be taken into account.

Before editing started, various behind-the-scenes discussions had taken place between me and the publisher to clarify what the imprint expected and wanted, the authors’ limited understanding of the publishing process and how it worked, and the specific issues that needed to be addressed in the text itself. These included:

  • Language and context considerations incurred by one of the authors being British and the other American.
  • Sensitivity issues related to the subject matter.
  • Cited text (of which there was a lot) requiring permissions not only from people who had contributed to the authors’ own podcast, but also from various publishers. The authors hadn’t yet addressed this and cited text comprised a considerable chunk of the narrative.
  • The lack of a recognisable referencing system for the incomplete, or non-existent, text citations.
  • And more worryingly, there was no visible, coherent narrative structure to present the book’s concerns to readers in a clear and accessible manner.

I have worked for this publisher for many years and generally, the texts they send me are in reasonable shape. But not this time!

The editing was very slow, as the authors’ meaning was often obfuscated and needed to be teased out. Over the next few days, a series of emails to my in-house contact, based on unexpected findings within the text, then led to a major rethink and completely different approach to the edit. My self-imposed deadline to return the text to the authors looked increasingly unachievable.

On Tuesday evening I escaped briefly to the monthly meeting of the Edinburgh Writers’ Forum (EWF), where I met up with another CIEP editor to enjoy an entertaining talk by Canongate’s Francis Bickmore about his publishing experiences. The EWF are a friendly lot, who kindly tolerate interloping editors, and abandoning work for a few hours of social interaction allowed my brain to power down and recharge.

Work continued throughout the rest of the week on the non-fiction text, interrupted only to field a few enquiries from private individuals, rather than publishing houses. On receiving sample texts, I duly drafted four quotes, two of which were accepted. One of my IFE tutees got in touch to ask for an extension, which I granted after consulting with the CIEP office.

Tutoring

And then it was Thursday and my final tutoring obligation for the fourth cohort of the HarperCollins Author Academy. The course is all online and covers fiction, non-fiction and children’s writing. I teach the fiction stream.

Weeks 1–4 encompass webinars on writing craft, which I present from an editorial perspective, based on the common issues I am always addressing in clients’ novels. There is also a session on the publishing industry in general. I love the class interaction with my students, but my favourite part is definitely the author panels in Weeks 5 and 6. Here, I get to meet and chat informally to some of the UK’s most successful fiction authors, as well as some newer, up-and-coming authors, who encapsulate a wide range of fiction genres. I facilitate a question-and-answer session in which no topic is off-limits, and let the students choose the direction of the conversation. Today – Week 6 – included one panel with two thriller writers and another with two fantasy authors, so there were lots of different considerations up for discussion.

I am always reassured that, despite some of these authors having sold 20–30 million copies of their books in multiple languages, they still have the same writing concerns and insecurities as the students. Without exception, they are all very generous with their time and advice to those starting out. It also helps that, without prompting on my part, they often reiterate the things I have spent the previous four weeks telling the students, which definitely bolsters my credibility!

As some of the Academy’s previous students have since gone on to win various literary prizes or to obtain publishing deals, my affiliation with the course is one of the most rewarding things I do professionally.

The end is nigh

And so to Friday. The non-fiction book is progressing, but the chances of getting it done before I take a week off look slim, especially as my weekend is full of family commitments. The publisher knows this and we will see where we are next Tuesday before I head to the airport on Wednesday.

The above might seem like a fairly frantic week. Admittedly, depending on my deadlines, I don’t always work on more than one text at a time, and my teaching commitments are spaced out across the year. But at the same time, it still isn’t that unusual to find me swapping between fiction and non-fiction projects, finishing one while starting another, and teaching in between.

Some might find my seeming ‘lack of focus’ perplexing and the above week exhausting, but the variety keeps my mind sharp as I switch between the requirements of different genres. It’s not for everyone, but the mixture of work also enables me to retain skills learned long ago, which might otherwise fall by the wayside if I focused purely on fiction.

Finally, such a broad-spectrum workload means that I don’t get fed up or bored with what I do, so overall, work is a pleasure, not a chore. And, for the most part, I can hit that early morning tennis ball without imagining it’s one of my authors or their text.

Update

Incredibly, after a major epiphany, a resultant increase in editing speed and a couple of very late nights, the non-fiction book was delivered on time before I went on holiday. It is currently with the authors, but will return to me sometime in the next few weeks. The next round of non-fiction editing will then continue into the start of the New Year … when I will also work on a fiction critique, teach again, attend a publishing event in London and copyedit another novel for a major publisher.

About Gale Winskill

Gale Winskill has been an editor since 1993, and has a wide range of experience across fiction and non-fiction. She is a judge for the Page Turner Award, and counts various prize-winning authors among her clients. She also provides training to both authors and editors on various elements of fiction writing and editing, and tutors for the CIEP and the HarperCollins Author Academy. Her clients hail from all over the world and encompass traditional publishing houses, private individuals and publishing training organisations. Whatever its genre, Gale enjoys spotting a manuscript’s potential and considers helping an author to develop and find their voice one of the best parts of her job. She is an Advanced Professional member of the CIEP.


About the CIEP

The Chartered Institute of Editing and Proofreading (CIEP) is a non-profit body promoting excellence in English language editing. We set and demonstrate editorial standards, and we are a community, training hub and support network for editorial professionals – the people who work to make text accurate, clear and fit for purpose.

Find out more about:


Photo credits: Tennis balls by cottonbro studio, laptop and coffee by Content Pixie, both from Pixabay.

Posted by Harriet Power, CIEP information commissioning editor.

The views expressed here do not necessarily reflect those of the CIEP

Talking tech: Getting the best out of remote meeting tools

In this Talking tech column, Andy Coulson discusses what you can do to improve the quality of your video calls.

During the pandemic meeting up has meant using remote meeting tools like Zoom, Skype, Teams and FaceTime. We’ve all become used to using them to some extent, whether we like or loathe them. Here I’m going to look at some of the things we can all do to improve the quality of what others see and hear on a video call.

There are three things we have control over in a video call – our WiFi signal, what our camera sees and what our microphone hears. I’ll look in detail at each of these below; they are all simple, low (or no) cost and often don’t involve the technology at all.

WiFi

Using remote meeting tools for video calls or meetings relies on a good internet connection because video needs lots of bandwidth, and it needs be reliable. To start with I am assuming that the internet connection to your house or workplace is reliable. If it is not, talk to your supplier as they should be able to test it and possibly diagnose problems remotely. I’ve just had my supplier resolve a problem caused by a faulty extension socket in the house and they’ve been brilliant. I’ve also learned a bit more about my connection, which means I can hopefully get issues resolved more quickly in future when I speak to them.

If the connection is all OK then you need to ensure you have the best possible connection to the internet. Many of you will connect via a router (the box your supplier provides). One of the simplest ways of ensuring you have a good signal is to use a cabled connection. Most routers have some network connections on the rear and they often come with a cable. However, this does mean you need to be close to the router unless you want to buy long cables.

Next, if you are connecting via WiFi or using a mobile phone you need to make sure you have as strong a signal as possible. To do this you will need to experiment and move to different parts of the house. Different materials block these signals to different degrees, so where your phone or laptop is makes a huge difference. I live in a bit of a mobile phone dead zone, so there are only a few spots in the house where I get a good mobile signal, and two places half a metre apart can have enormously different signals. Your phone indicates the strength of WiFi and phone signals and your laptop will show the WiFi strength, so use these to find a good place to work with strong signals.

Person at desktop computer on a video call

Getting the best from the camera

Cameras on mobile phones and laptops are generally pretty good. The software behind them gets ever more sophisticated, but you can make the job easier by thinking about what will be in the camera’s view and how it will be lit.

One of the easiest things to do is to have as clean a background as you can. I often hang a sheet behind me or use a projector screen, as this gives a plain background. A plain background helps the camera to focus on you, because you are easier to pick out. This in turn helps with lighting, because if the camera can pick out your face easily it will try and make that look as good as it can by adjusting the brightness.

If you use a camera app (eg Camera in Windows) you can play around with backgrounds and see what works best. For the space I use I think a pale background works best, but you may find that something dark works better.

The other thing you can control is lighting, and this can make a huge difference. If you are near a window, the time of day and time of year also make a difference. For example, my office is in the attic and I sit with a Velux window above and behind my head. In the summer, when the sun is on that side of the house, I have to black that out; it is so bright that the camera struggles to make out my face. In the winter I sometimes use the sunshade blind and it doesn’t cause a problem, as the light is at a lower level. So, the first thing to look at is whether you have blinds or curtains that can control the natural light. Again, experiment before the call.

What you are after is even lighting of your face that is not so bright that it makes you squint. This means that ideally you want light from both sides of your face. For example, a couple of desk lamps would work, one on either side.

Try to avoid lighting just from above you, as it creates shadows that are not flattering! If you have no other option, it might be worth experimenting with either white paper or foil on your desk to try to reflect some light into those shadows.

I have a photographic reflector that I use (essentially a metre-wide foil circle with a rim that keeps it taut). I tuck this behind my monitor so two-thirds of it sticks out above and leans towards me. On a not-too-bright day I use a combination of my desk lamp and the light from the Velux window to bounce back off that and light my face.

Sound

Your microphone, like your camera, has sophisticated software behind it that helps to isolate your voice from other sounds. Generally, this is the default setting in most software, but you can help it along by making some good choices.

The first thing to think about is: how noisy is the room you are in? If it is noisy, can you move to a quieter room? (Apologies if you’ve just carefully crafted your lighting set-up!) There may be other things you can do like shutting doors or windows, too. The more noise you can exclude, the less work the software has to do to eliminate the noise and the clearer you will sound.

Once you are happy, open your remote work software and find the microphone settings. There is a microphone level indicator, which is a bar or series of dots that go up and down in response to what the microphone picks up. If you speak in your normal voice while facing the microphone this should bob up and down between about 50% and 90%. If the levels fall much outside this then the program may have a microphone volume or sensitivity control you can adjust. If not (for example in Skype) the system controls are used. In Windows this is in Settings > System > Sound. It is worth checking this before any call.

When you work from home and use video and audio calls, remember that you are not in a studio where everything is well controlled and consistent. The conditions at home (noise and lighting) will change from day to day and hour to hour, so you need to look at look at how things look and sound before a call. As I mentioned above, most of the things I’ve mentioned can be done for little or no cost. Have an experiment – and please share any tips of your own in the comments below or on the CIEP Forums.

About Andy Coulson

Andy Coulson is a reformed engineer and primary teacher, and a Professional Member of the CIEP. He is a copyeditor and proofreader specialising In STEM subjects and odd formats like LaTeX.


About the CIEP

The Chartered Institute of Editing and Proofreading (CIEP) is a non-profit body promoting excellence in English language editing. We set and demonstrate editorial standards, and we are a community, training hub and support network for editorial professionals – the people who work to make text accurate, clear and fit for purpose.

Find out more about:


Photo credits: header image by Kampus Production on Pexels, person on video call by Karolina Grabowska on Pexels.

Posted by Harriet Power, CIEP information commissioning editor.

The views expressed here do not necessarily reflect those of the CIEP.

Wise owls: how do you save time when editing?

We asked our parliament of wise owls, all Advanced Professional Members, to share some of the things that have helped them to become faster, more efficient editors over the years. Answers ranged from macros, checklists and templates to a healthier work–life balance and the confidence gained from experience.

Sue Browning

My main tip for speedy editing is to slow down and take a breath before you dive in. I find it helpful to approach large projects in phases, doing basic analysis (headings/structure/style), clean-up and formatting first, followed by my main text editing pass, then a final consistency check and spellcheck. This is all driven by checklists (and sub-checklists). While trundling through the initial, somewhat mechanical, stages may feel like delaying the core task of editing, I find it settles me into each project in a series of familiar steps so that even a new or challenging job feels more under control by the time I start looking at the text.

Another more obvious timesaver is my stylesheet template with combo boxes that contain the most common alternatives for each style point, making setting up my initial sheet very quick. Thanks to Hazel Bird and her helpful blog post for bringing this useful technique to my attention.

Next is keyboard shortcuts, both for frequent operations, like switching between windows and desktops, all the usual Word commands, and for my many macros. I have a lot of keyboard shortcuts, but I learned them slowly, converting the often-used ones to muscle memory, making room in my brain for the next batch.

But probably my biggest practical timesaver is PhraseExpress, a text expander, which I use for emails, author queries/explanations, and any bits of text that I find myself typing repeatedly, including things that I frequently mistype, like my email sign-off. PhraseExpress’s web look-up function also saves me ages when checking references.

Finally, there is the confidence that comes with experience. I know my major clients’ style preferences pretty well (and have PerfectIt stylesheets to help), my grammar and punctuation are pretty sound, and I no longer angst over every comma (just some of them 😉).

Liz Dalby

I’d say that three things in particular have made me a more efficient copyeditor.

  1. Learning to do the language editing late in the process. When I started freelancing, my instinct was to sit down at the text and work through it from beginning to end, reading every word and working on everything that needed doing all at once, as I encountered it. Over the years I have learned – by trial and error, and also by discussing best practice with other editors – to work in a series of passes. Broadly speaking, I start by styling the headings, which gives me an overview of the structure. Then I focus on some of the basic cleaning up I can do, and applying global style decisions based on my own observations of the text, plus the brief and the house style (if there is one). Once the text is in better shape, only then do I start to read it from beginning to end, smoothing out the language as I go, and continuing to add to the style sheet. The language editing isn’t the final pass, because after that there will be a series of checks (depending on the brief and the budget). But it’s nowhere near the beginning! This has made my process massively more efficient – and accurate.
  1. Working within my limitations. Like (probably) all freelancers, my initial instinct was to work ALL the hours in order to establish my business and make a good living. Now I know that I do my best work when I only do about four or five hours of pure editing per day, and take breaks at weekends. I hate working in the evening, so I hardly ever do it. This all keeps me fresh, and able to work quickly. It took me a long time to figure this out. I should have listened harder to advice from more seasoned freelancers! But it is hard to put this into practice until you have built up a steady stream of well-paid work.
  1. I’m passionate about this last one: I approach a text asking myself what can stay the same, rather than what I can change. This can save unnecessary work, and it can also help to build a better relationship with the author, who can see that you’re not making change for change’s sake. However – it’s still important to recognise when fundamental changes are required, and do all of the work that’s needed. Judging this takes experience, and even then it’s possible to get it wrong.

Sue Littleford

Chatting with other editors, I’ve discovered that I’m not the only one who’s slowed down a bit over the years! We think it’s because we know better what we’re doing, where our weak spots are, and we don’t skip things because of inexperience. But, of course, I’ve had to fund that time by finding efficiency savings.

I’m wedded to checklists. They save time by making sure I cover all the steps I need for onboarding or handover and can tick off each requirement as I’ve done it. I also have checklists where I’m required to nudge the English one way or the other (US to UK, for instance), for handling collected volumes and, indeed, for any repeated sequence of tasks.

As anyone who has done the CIEP Efficient Editing course will know, another key is to do things only once, and in the right order – checklists are your friend for this.

A second go-to is PerfectIt – I always, always run it at the end of the job (making it a game between me and it), but I also run its Summary of Possible Errors report at the start, a quick way to give me a good view of the condition of the manuscript, and start thinking about style decisions without making premature changes (discount for CIEP members – you’ll need to be logged in). PerfectIt works best on PCs, but a limited functionality version is available for Macs. I have style sheets for each repeat client.

Finally, I use templates (for my checklists, my style sheets, my word lists and so on, tailored for each repeat client, and a generic version for new clients, which then becomes the tailored template), and a text expander for frequent emails (handover, for example) or author queries text. No reinventing the wheel for me!

Michael FaulknerMichael Faulkner

These are my top tips for speeding up the mechanics of the editing/proofreading process:

  • Buy the biggest monitor, with the highest resolution, you can manage. When I moved from a 27″ to a 32″ monitor, my work rate greatly accelerated.
  • Download two amazing free utilities: AquaSnap and TidyTabs. Using them in combination, you can access and organise all open programs/documents with no clutter. I keep the largest part of screen real estate for the document(s) I’m working on but have everything else off to the side, tabbed and ever ready.
  • Download a (free) text expander to add frequently used words or even large blocks of text with a couple of strokes. I use FastKeys. You can also use it to build macros.
  • Create a Word template for every kind of project you work on (I have half a dozen fiction templates and eight templates for different types of legal publication); populate each template with a Word style for every conceivable character or paragraph element you’re likely to need for that particular type of project; and add a keyboard shortcut for every style you might want to invoke more than a couple of times. Using styles in this way I can tame a 15K-word chapter, which contains only direct formatting and is full of displayed quotes, different heading styles, lots of levels of numbered subheads and the like, in 15 minutes.
  • This one is a question of do as I say, not as I do 😊. Use macros. I’m scared of macros because they have caused unwanted (and unnoticed) wholesale changes in the past that have got me in trouble – but when you master them they’re incredibly powerful.

Hazel Bird

When it comes to speeding up the editing process, one thing I’ve found indispensable is master documents. This is a feature of Microsoft Word that allows you to combine many documents together and work on them as if they were a single document. Master documents have a reputation as being tricky to handle and unpredictable, but in my experience only the first of those characterisations is true. If you ever need to work on multiple related documents at once (such as multiple chapters in a book), it’s worth taking a course on master documents or reading up on how they work. Once you’ve learned their quirks (the ‘tricky to handle’ bit), the seeming unpredictability mostly becomes clear and they open up a paradise of efficiency. It was a revelation to me when I first realised that I could do a PerfectIt run or fix a problematic phrase on five, ten or even a hundred related documents all at once. I’ve found master documents most powerful in my encyclopedia work, where they have allowed me to seamlessly edit and check millions of words at a time. And, of course, this can lead to quality improvements too, as it makes implementing consistency easier.

It’s worth saying that this way of working doesn’t suit everybody and there are other methods (such as Paul Beverley’s FREdit macro) of tackling repeated issues across multiple documents. Also, if you want to use master documents on very large numbers of files, you may find your computer limits what you can achieve. However, if like me you feel most comfortable in your editing when you have everything visible all in one place, then master documents are worth a look.

About the CIEP

The Chartered Institute of Editing and Proofreading (CIEP) is a non-profit body promoting excellence in English language editing. We set and demonstrate editorial standards, and we are a community, training hub and support network for editorial professionals – the people who work to make text accurate, clear and fit for purpose.

Find out more about:


Photo credits: owl by Hoover Tung  on Pexels.

Posted by Harriet Power, CIEP information commissioning editor.

The views expressed here do not necessarily reflect those of the CIEP.

Dealing with the death of a client

In this post, Vanessa Wells reflects on what happened when one of her repeat indie clients died unexpectedly. The CIEP information team also give some practical tips for dealing with the death of a client.

Vanessa’s experience

I’ve been editing for a decade and last week had my first experience of the death of a client.

This fellow was a repeat client. He’d been nominated and shortlisted for awards for his excellent books. He was the type who paid literally within five minutes of receiving my invoice. He was thoughtful and appreciative of the editing process. In short, he was the ideal client.

I was going to edit his next novel shortly; he just wanted a few more weeks to tweak the manuscript. Meanwhile, I’d come down with Covid, and when I saw online the news of his death, I was gutted – perhaps made more emotional by feeling physically depleted but also because it was yet another good person gone: I’d lost a dear friend early on in the pandemic and a former student died by suicide this year. Aside from no longer having this great writer to work with, I started to wonder why his death hit me as it did.

The author–editor relationship

The longer I edit, the more I appreciate writers’ craft. I really am impressed with their abilities and, in those with perhaps less skill, their tenacity and courage. I don’t take lightly the idea that we are here to collaborate with authors, rather than rewrite their work as we see fit. What they produce deserves to be treated with respect, and how we interact with them and their text should be a safe space. Sometimes the vulnerability they reveal is shocking. There are projects where we are the first person to read what they have written. David Shannon wrote Howul while his wife thought he was watching footy every night in his den. So there can be a creative and intellectual intimacy with an editor that a writer doesn’t have with others. The more vulnerable the author, the more they are opening their heart to someone whose metaphorical red pen they fear. The trust they are placing in us to provide constructive suggestions can be immense.

Conversely, we might be the first person to validate their efforts. Perhaps their labour of love has been denigrated by others as just a hobby. We may be coaching someone who’s kept their desire to write a secret or an untried exercise for decades. The analogy to writers birthing their babies may be a bit hackneyed, but I’m very conscious of the midwifery role I play.

As a sensitive person, I know what it feels like to be corrected. I bear that in mind in the wording of my comments and suggested edits, regardless of whether my feedback is gently critical or laudatory (and usually it’s a delicate balance of the two). I often feel like I learned the dynamics of this from my twenty years of teaching, also moulded by my own student experience of both kind and mean teachers. We have the power to inspire or wound (be it as editors or just in everyday life), and sometimes we can discern something of our clients’ personalities from their first emails to us. A tentative little dance underlies their questions, which can make us feel sympathetic and perhaps already a little protective of them in the process they’re about to take on.

I think this special type of relationship is not common to many professions, and the resulting connection that is lost upon a client’s death can leave us feeling gutted.

Financial considerations and the future

A friend commented that my author’s death must have come as a financial blow, too – which it did. I hadn’t asked him for a non-refundable deposit as I knew how reliable and accommodating he was. (And, in fact, fate unexpectedly dropped a new indie client in my lap the same day.) But even if I had been more proactive about using my usual contractual practices with him, I certainly would never have kept the deposit. Perhaps if there were different circumstances with, say, a single author and an executor, I might consider pursuing my balance owing if I had (almost) finished an edit. But as an editor, I believe my business is as much about the writer as the text, and I would not be comfortable pursuing payment no holds barred.

I hope that one day my client’s wife will look me up in his email and offer to let me read his sequel. I appreciated him for his work, not the income. From what I’ve seen in social media posts about him since his death, he was widely admired for his character as much as his skill. I’m sorry to have lost him as a client, but I’m grateful for having had the opportunity to work on such excellent writing. Another loss during this difficult period, but another blessing to recognise in my career as an editor.

Blue skies, sir!

Pink blossom being blown from a tree in front of a blue sky

Practicalities: What to do if your client dies

If you are aware that your client has a terminal illness (you might, for example, be working on their memoirs), you should agree in writing the steps to take in the event of their death. This may cover who will contact you with news of their death, the proportion of the fee to be paid, and what to do with the manuscript.

You may, in fact, find it helpful to include such information in your contracts as a matter of course – and to include similar information for the client in the event of your own death or incapacity while you are working with them.

Be sensitive to the feelings of your client’s family and/or colleagues – and allow time for yourself to grieve, if necessary. Similarly, if you have only just found out that your client has died after chasing a response or asking for a new draft, try not to feel guilty if you think your approach seemed insensitive. You couldn’t be expected to know what had happened.

If you have completed the work and wish to be paid, you will need to be proactive. Again, try not to feel guilty – if you have completed the work and fulfilled your part of the contract, you have the right to be paid as part of the business transaction.

Corporate clients and publishers are likely to have accounts departments, which will be independent of your contact and have their own email address. Write to them, explaining the situation. They will use their internal processes to find out the status of your payment. For example, if your contact died before raising a purchase order, the accounts department should identify an appropriate colleague who can verify your work and raise the PO retrospectively.

For individual clients, such as self-publishing writers, the executor of their will is responsible for ensuring their debts are paid but this might take months or even years. You might feel it’s not worth pursuing and that it’s more prudent to write it off.

If you send out email newsletters or other forms of marketing, remove your client’s name from the mailing list immediately.

If your contact was a corporate or publishing client, and you wish to keep working for the organisation, find out who is covering their work or replacing them and politely introduce yourself. Outline some of the projects you’ve worked on for your client and the benefits your work brought. This is the same approach you might take if your contact had simply left the company.

About Vanessa Wells

Vanessa Wells is a fiction editor and an Advanced Professional Member of the CIEP. She lives in London.


About the CIEP

The Chartered Institute of Editing and Proofreading (CIEP) is a non-profit body promoting excellence in English language editing. We set and demonstrate editorial standards, and we are a community, training hub and support network for editorial professionals – the people who work to make text accurate, clear and fit for purpose.

Find out more about:


Photo credits: clocks by Giallo, blossom by Recal Media, both on Pexels.

Posted by Harriet Power, CIEP information commissioning editor.

The views expressed here do not necessarily reflect those of the CIEP.
Systematising my working life

By Sue Browning

In all aspects of my life, I’m a great fan of systems that help me keep on top of stuff, as I find having a system frees my mind and memory for more important things. This applies to my work life too, of course; I always like to know where I am with project scheduling, prioritising work, timing, invoicing and record-keeping, and over the years I’ve explored a lot of tools for doing all these things. And, for me, all these systems have to be on the computer, as my handwriting has a half-life of approximately two hours.

Open diaryFor a long time, I used a mind map to keep a record of all my clients and projects, a Gantt chart to visualise my schedule, and a to-do list+time tracking program to keep track of what I have to do and by when and to record time spent, and I had a semi-automated system to generate invoices in Excel, saving them as pdfs to send to my clients. I’m also a demon for data, so I have 14 years’ worth of detailed information on income, clients, projects and timings, all in a set of interlinked spreadsheets, which also need to be kept in order.

However, I’m also a fan of not spending more time on admin than necessary, and none of these individual programs talked to any of the others, so there was always a certain amount of tedious (and error-prone) copying from one to another. I was therefore on the lookout for a way to automate more and to streamline my systems. I reviewed a lot of different software programs and online apps and found them too inflexible, too focused on the mechanics of invoicing, which is actually a very small part of my working efficiency. But, more crucially, they all lacked that visual scheduling element I was really looking for.

Then someone in one of the editing groups I frequent mentioned a web-based app called Cushion, and that seemed to fit the bill in that it appeared to provide a very flexible platform for visualising my long-term schedule, planning detailed workloads, tracking the time on each project and generating invoices – all in the same place. The free 30-day trial also reassured me that I could bend it to my will. The developers were also fabulously responsive to my questions, and this convinced me it was worth paying for, so at the start of my new financial year this April, I decided to give it a go.

After an initial time investment inputting client and project details and customising the various options, I have found it very easy to keep track of everything, and I have cut a significant amount of time from my various record-keeping activities.

A view from above

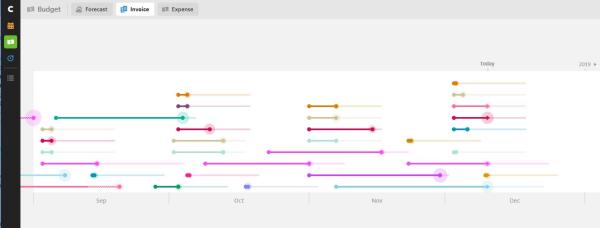
I particularly like the bird’s eye scheduling view as this shows at a glance how busy I am projected to be over the next few months (see the screenshot), so when I am offered a new project I can easily see when (or if) I can fit it in.

Sue's schedule in Cushion

Overview of my next few months’ work. The pale lines are projects I’m waiting to start, and the bright ones with a circle at each end are completed. Bright lines with arrows are ongoing, with the arrow head at ‘today’. Mousing over them pops up brief details and clicking takes me straight to the detailed project information page. The blue block shows the time I intended to take off over Christmas – ha ha!

To help further with organising and planning my work, below this chart is a client/project list that can be ordered in any way (I order it by due date), which I categorise into Active (projects I’m actually working on), Upcoming (where I’ve got the files but haven’t started), Planned (projects that are currently mere glints in their parent’s eyes but we have a target date, so they are lightly pencilled in), and Completed (categorisation is also customisable).

Time tracking

I’ve always kept a track of how long I take on each project, even when I’m not billing by the hour, as it helps in estimating fees, and I can do this easily in the timing area, where I can switch the timer on and off and assign it to a specific project/task. The timer shows green in the browser tab, too, which is a great reminder to switch it off, but the times can be easily edited if I do forget. As well as recording time, I can see how many hours I’ve worked on each project over the day or week, and I can also pull up overview reports according to client, project or time period. One of the fun things I like to do is label my timer with a particular task, so that at the end I can see how long I spent, say, checking references as a proportion of the whole project (typically about third, in case you’re wondering). (And yes, I do have an odd sense of fun.)

Work done – time to invoice

As well as the usual month-long, bill-at-the-end projects, I have a number of clients for whom I edit shortish pieces of work as and when they need them, and I send an itemised invoice at the end of each month. Before, I would track the time in my tracking app, transfer that and the task details to a client-specific spreadsheet, and then at the end of each month, I’d have to copy the details to my invoice. That was fine when I didn’t have many such clients, but now I have nearly a dozen, so my monthly invoicing run had become really quite time-consuming.

Now – at the click of a button – I simply pull the details (date, job name, rate and hours) from the Cushion timer into my invoice, download the pdf and send it to my client by email. (It is possible to send an invoice direct from the app – and reminders too, if you wish – but I don’t use this as it requires recipients to click a link, and some of my clients have automatic systems that need an actual attachment.)

Invoices appear in a list, sortable according to my whim, and they are displayed on a timeline too for a very quick overview (see screenshot).

Screenshot of invoices section of Cushion

My invoice timeline. Those with arrows at the end are awaiting payment, and it’s easy to see when they are due. Mousing over reveals a summary, and there’s a detailed list below. You can tell from this that I have a monthly invoicing round, and most of my clients pay really quickly.

Keeping organised and keeping records

All the data stored in the app can be downloaded as.csv files, openable in Excel, so as well as storing these as a backup, I have adapted my accounts spreadsheet, which records invoices and expenses each month and keeps a running total for the year, to extract the data from those files. And that feeds semi-automatically into that suite of historic spreadsheets I mentioned earlier.

Every Monday I receive an email with a list of outstanding invoices and active projects, which is a great way to start the week. And the system also sends me an email to tell me when an invoice is due.

Apart from the fact that the timeline displays make it very easy to visualise my schedule and workload, the best thing as far as I am concerned is that everything is interlinked, so I can click on a client’s name and it’ll take me to a page that shows me everything about that client – contact details, projects, invoices (paid and outstanding), total income from them this financial year, how long it takes them on average to pay me, and a lot more. All the features are easily edited, and it’s easy to find a way of looking at the data that suits my own way of thinking – helping me feel in control and better able to focus on the things that matter.

Headshot of Sue Browning After a long and interesting career in speech technology research, Sue Browning turned to editorial work in 2005, finding another way to apply her interest in all things to do with language. Sue specialises in copy-editing linguistics and other humanities and social sciences for publishers and academic authors. When not prowling the halls of academia, she often finds herself walking on alien planets, wielding arcane magic and generally having fun with fantasy. When not editing, she likes to walk and cycle, and grow vegetables. Indoors, she likes reading (of course!) and word puzzles, especially cryptic crosswords.


Posted by Abi Saffrey, CIEP blog coordinator.

The views expressed here do not necessarily reflect those of the CIEP.